You can now use viaSocket MCP directly from Windsurf IDE. This lets your AI assistant perform real-world tasks through a simple, secure connection, all without leaving your coding environment.
Quick Start
Here are three simple steps to get started with Windsurf and viaSocket MCP:
Copy your unique MCP server URL from the viaSocket MCP in your workspace.
Configure the actions you want your AI to access.
Open Windsurf and add the MCP URL in the settings.
Configuring MCP in Windsurf
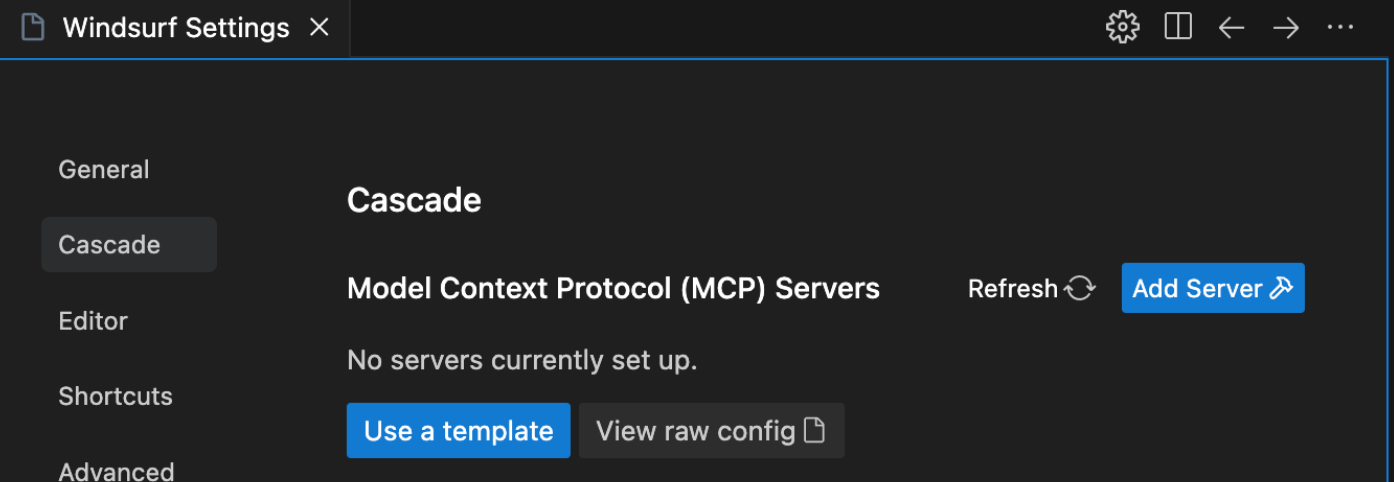
To set up MCP with Cascade:
Go to Windsurf - Settings > Advanced Settings or open the Command Palette and select Open Windsurf Settings Page.
Scroll down to the Cascade section.
Here, you can add a new server, view existing servers, and access the raw JSON config file at mcp_config.json.
Adding a New Server
To add a new server:
Click the "Add Server" button in the Cascade settings.
Choose from the pre-populated popular servers or click "Add custom server +" to add your own server directly in mcp_config.json.

mcp_config.json
The mcp_config.json file, located at ~/.codeium/windsurf/mcp_config.json, lists the servers Cascade can connect to.
The JSON format should match the same schema as the config file for Claude Desktop.
Here’s an example configuration for viaSocket MCP:
{
  "mcpServers": {
    "viasocket Actions MCP": {
      "serverUrl": "https://mcp.viasocket.com/*************/sse"
    }
  }
}